
Many of you remember that last year I said that I had plans to make a DIY dog grooming table.
Well things happened and time flew by very fast and I slacked on having that table made.
Quite a few of you reached out over the past few months asking if I ever made it so the pressure was on to get it made!
I apologize for not getting around to it sooner but it’s now done and I have all the information that you need to get started on making your own!
Before I give the details I wanted to mention a few things.

First, I love this DIY dog grooming table.
Seriously, I’m madly in love with it and I wish I would have had this for Sherman and Leroy.
Second, I did not technically make this.
I wifervised my husband making it.
We went together to get all the supplies, I helped upload those supplies and gave my husband specific instructions on how I wanted it but I did not cut, screw or measure a thing.


Well, I did measure our regular store-bought grooming table but I didn’t measure and cut for the new one!
Third, I can not stress how important it is that you customize this to you and your dog(s).
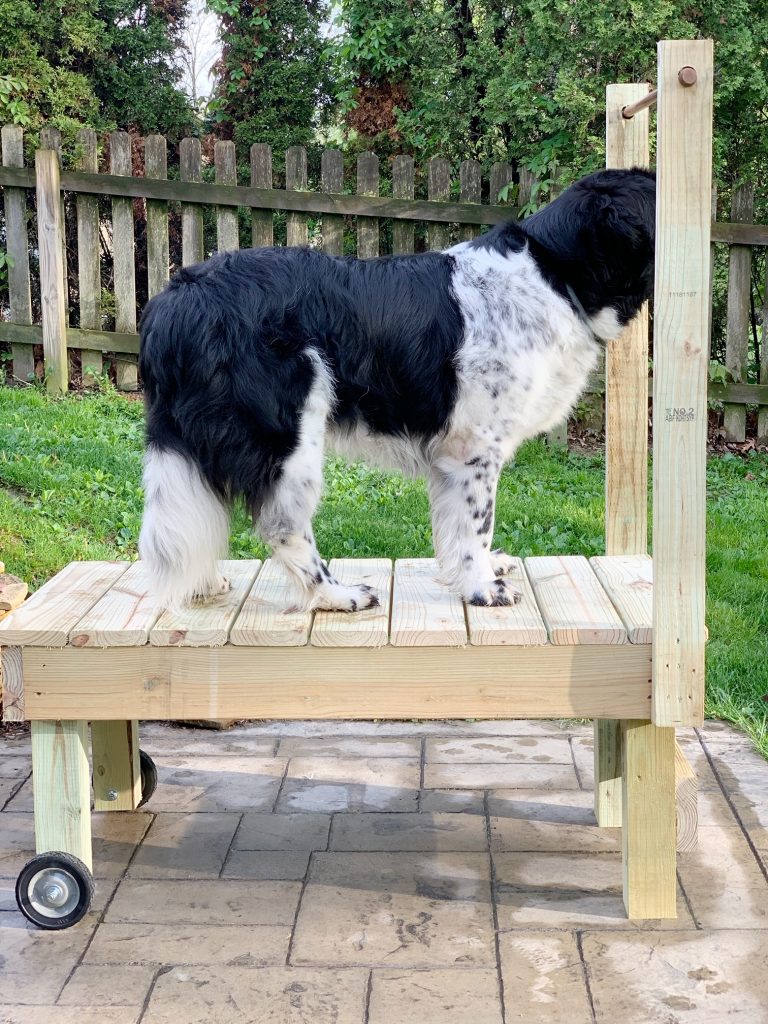
Most normal grooming tables for big dogs are going to be 48″L x 24″W
The only thing I kept the same was the length.
Width:
I made the width 26 inches wide instead of 24 because I wanted more room for a bigger Newf.

When Sherman used to lay on our table he would almost spill off the side so 2 inches gives me and a future Newf a little more space.
Odin is a smaller Newf so he would have been fine with the standard 24″.
Height:
Most standard tables are 24″ but I’m short so grooming a Newfoundland on a 24″ table was not comfortable for me.
This table is 22″ making it easier for me to work on a dog without having to stand on my tippy toes.


I’m 5’2″ for reference.
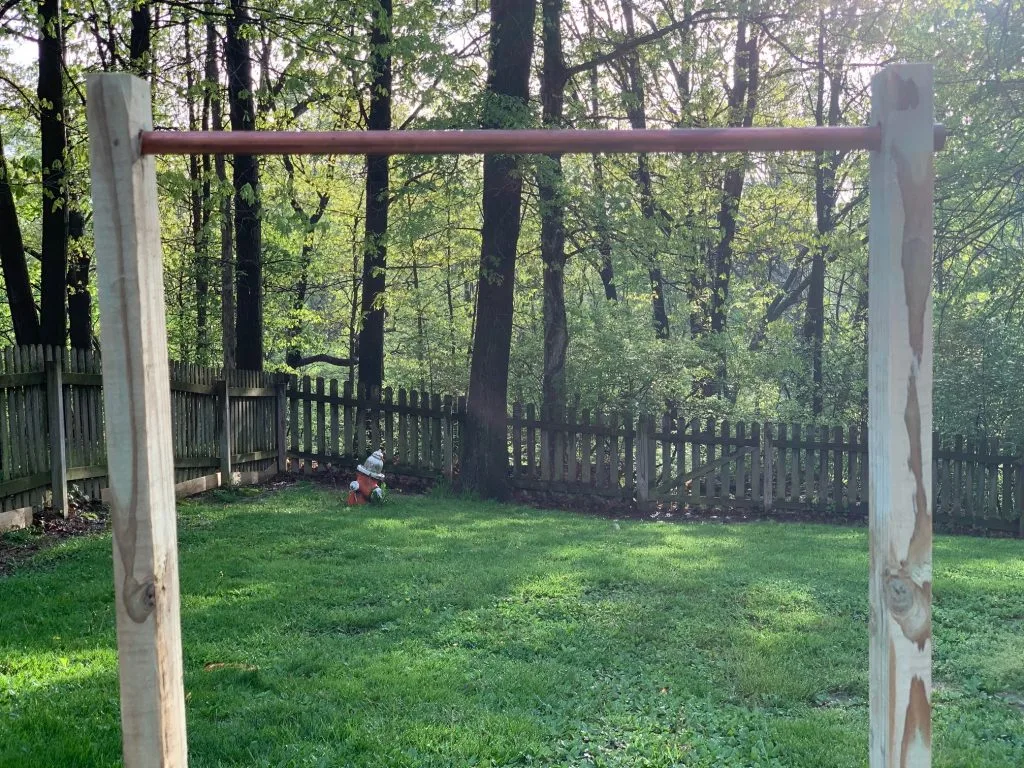
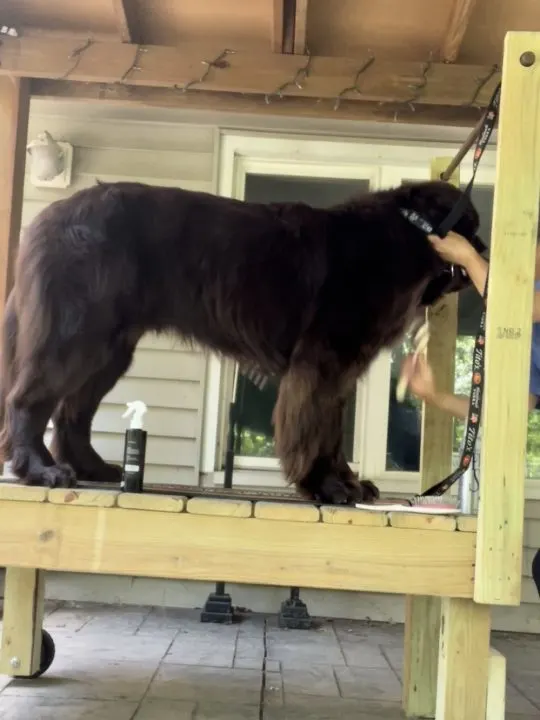
Grooming Arms:
You don’t have to have the grooming arms BUT I would recommend them.
A grooming arm is going to help keep your dog safe and stable and it’s going to teach new dogs to stand still while being groomed.
There are several different arms you can build including purchasing one online.
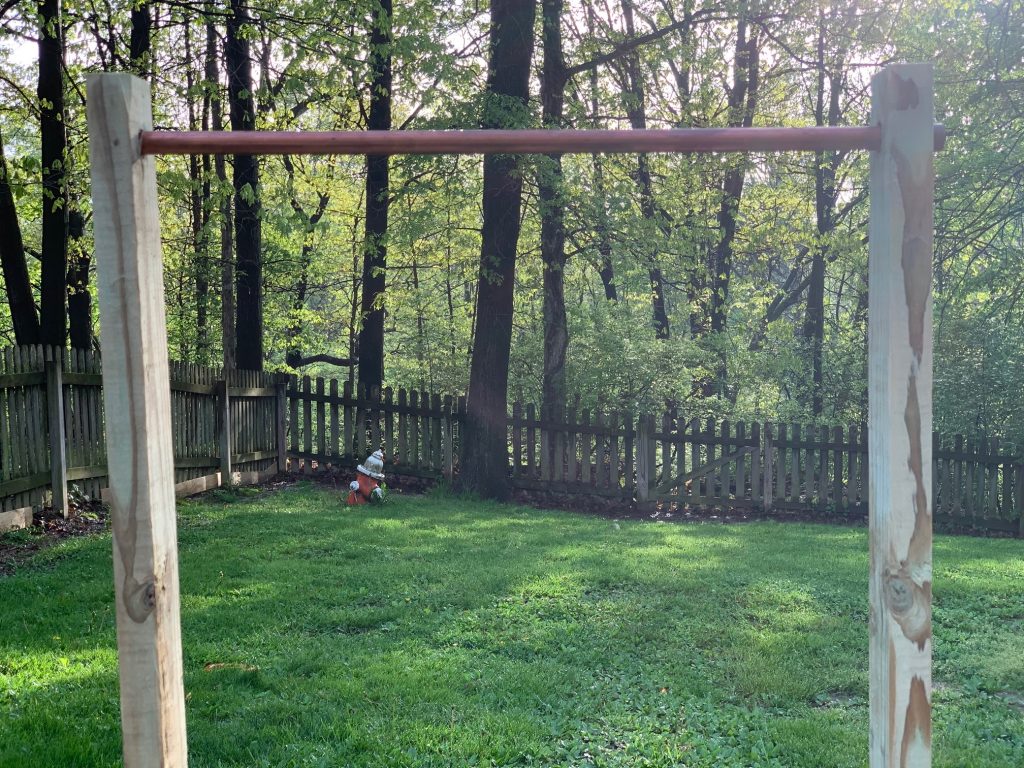
You can use wood, metal, or even PVC pipe.
You can also do a rear grooming arm to keep your dog standing and for extra safety so they don’t slip or jump off.
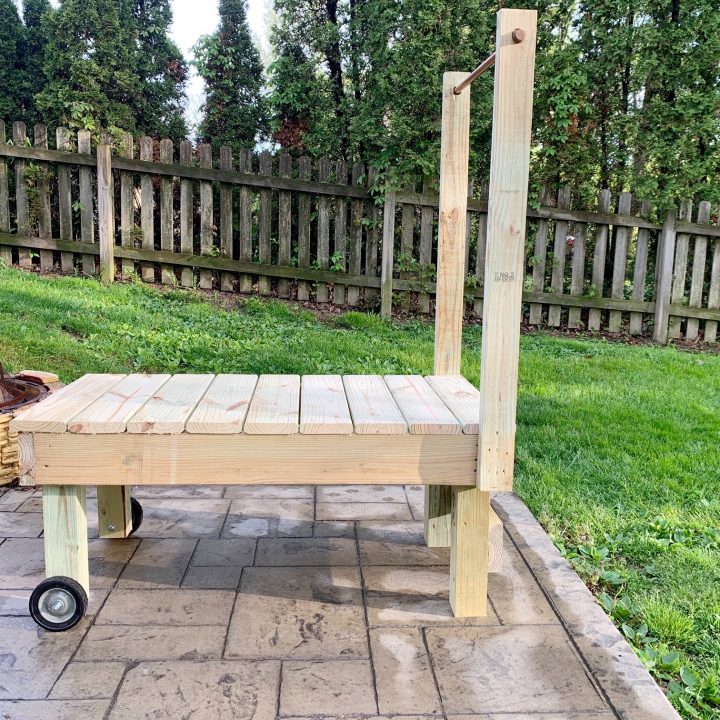
We used a copper pipe for the hook-up but you can use wood.
Our pipe is not secured because we’re going to drill another area farther down for Finn.

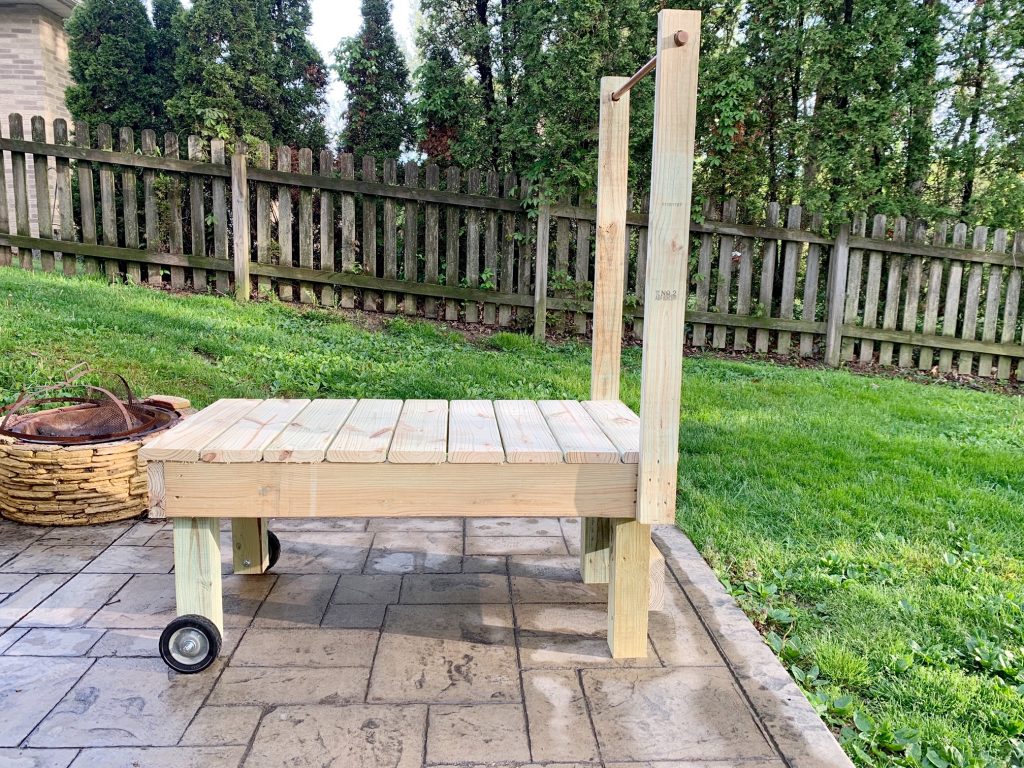
Wheels:
Wheels are optional and not needed if your grooming table/washing station is going to be stationary and not moved around.
Ours is not in a permanent spot so the wheels make it easy to transport.
It’s heavy, so I would not be able to move it alone without the wheels.

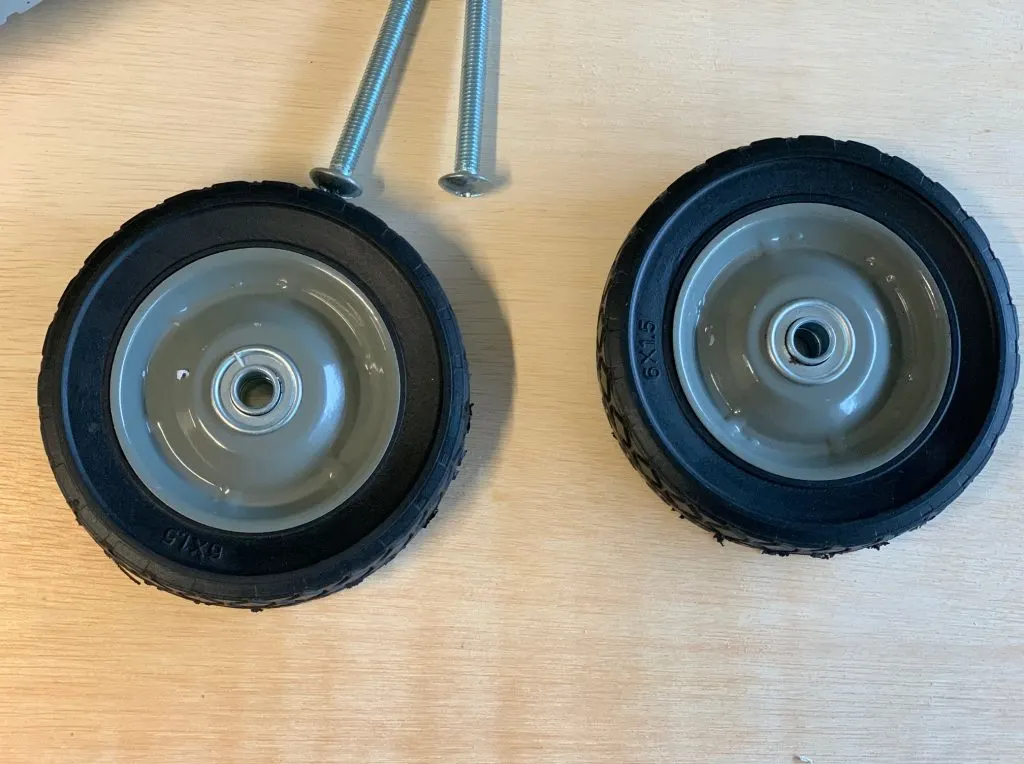
We used lawnmower wheels.
You can put the wheels on the front or the back.
It’s not going to move either way with your dog on it.
We put them on the back because it’s less heavy for me to move.
Bathing Station:
This DIY grooming table can also double as a bathing station.

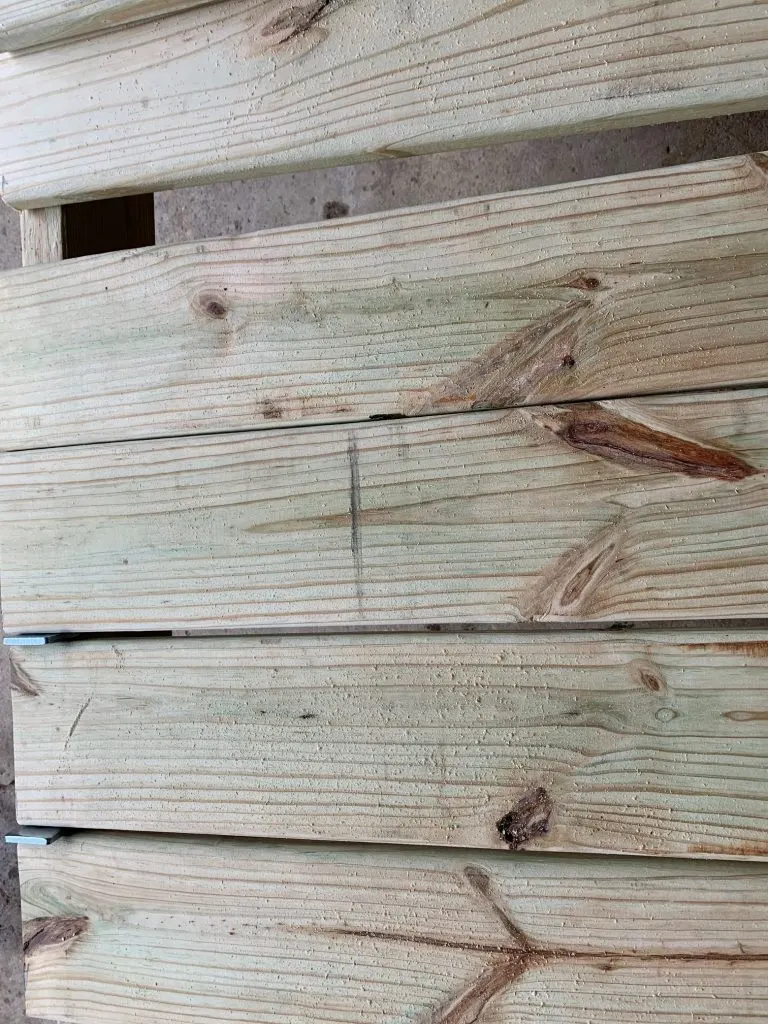
We left small spaces between the boards so water can run through.
Padding:
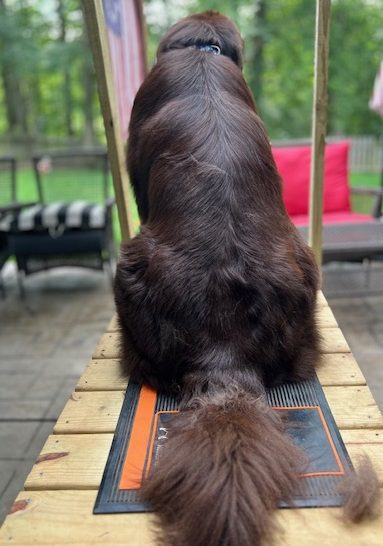
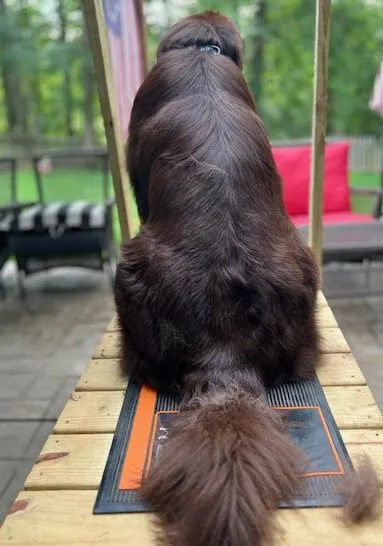
If you want something softer for your dog to stand on while on the table you can use a yoga mat, non-slip rug, rubber mat, or even a cooling pad.
If you’re going to leave it on while bathing you’ll want to have drainage holes.

Sealing:
We are going to seal this with Thompson water sealer after the pressure-treated wood dries out.
DIY Grooming Table Materials
- (1) 4 x 4 x 8 pressure treated post (legs)
- (1) 2 x 4 x 8 pressure treated 2 x 4 (arms)
- (2) 2 x 6 x 10 pressure treated 2 x 6 (frame)
- (2) 12-foot pressure treated deck boards (top)
- (1) 1 pound box of 3″ inch deck screws
- (2) 3/8 x 6 toggles
- (4) 3/8″ nuts
- (8) 3/8″ washers
- (1) 30″ copper pipe or any type of rod or hardwood round dowel.
- (2) 6-inch lawnmower wheels
- Spacers-optional. These are to evenly space your deck boards.
We got all of our supplies except for the lawnmower wheels at Home Depot.
The wheels I picked up at Tractor Supply.
Tools Needed:
- Miter Saw
- Drill
- Impact Drill
- Tape Measure
- Speed Square
- Hole Saw

Building Directions:
I guess the directions are kind of self-explanatory but I’ll give basic directions in case you’re like me and don’t know how to build a thing.
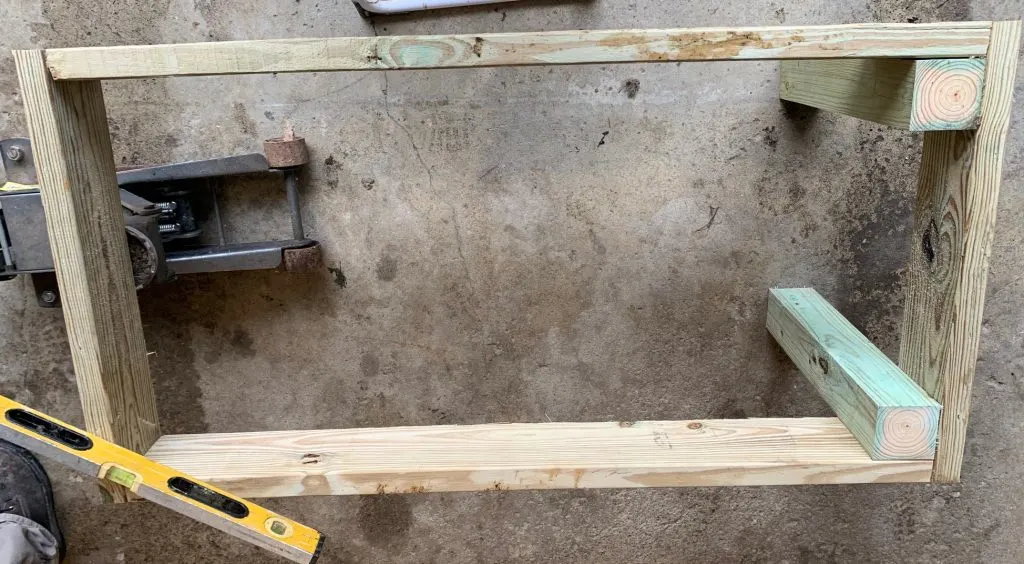
- Measure and cut the legs with a miter saw. Your back legs are going to be shorter because you have to put the wheels on. This measurement will be based on what size wheels you get and where you place them.
- Measure and build the frame. This is using the 2 x 6 x 10 wood. Ours is 48″ long and I added 2 inches to the width making it 26″ wide.
- Next, you’ll screw the frame to the legs
- Measure and cut the deck boards.
- Use spacers to evenly space out the boards if you’re planning on using this to bathe your Newfoundland
- Measure and cut the arms.
- Cut out a hole for the copper pipe using a hole saw (1-1/4) Our pipe is 30 inches long and 39 inches from the deck boards.
- Put end caps on if you want the pipe to stay in place. We want ours removable because Finn is a lot smaller than a Newf
- Seal the wood as directed on the can of sealer. (ours says to wait a few weeks/months)

This whole project took my husband a little less than 2 hours.
We spent about $80 in supplies for this DIY grooming table.
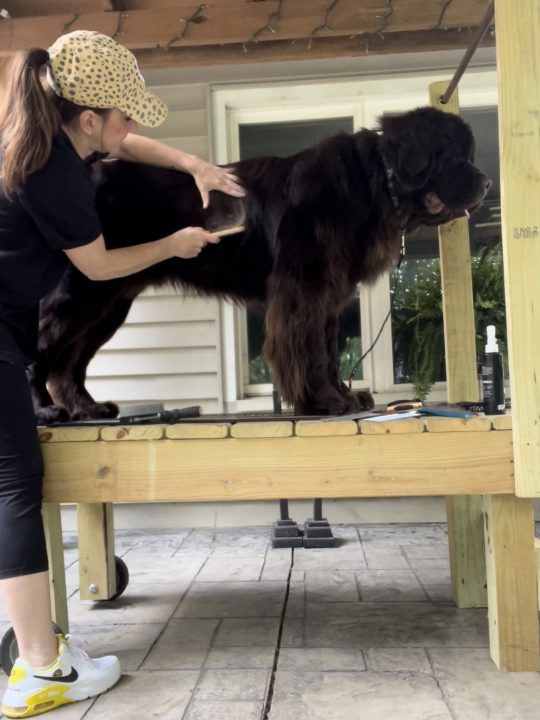
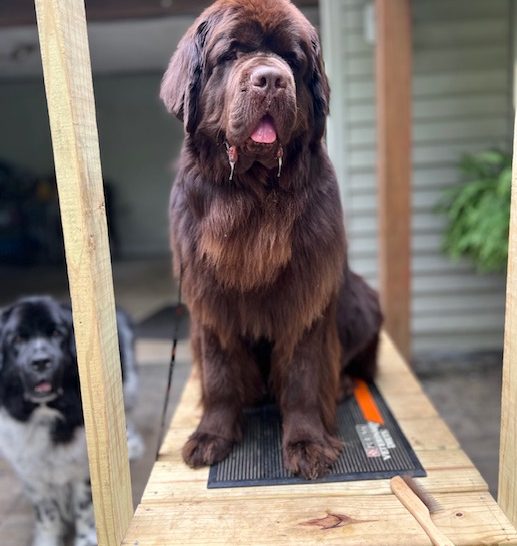
I also added a LickiMat to the arm.
The suction wouldn’t stick so I just tied it on with a shoelace.

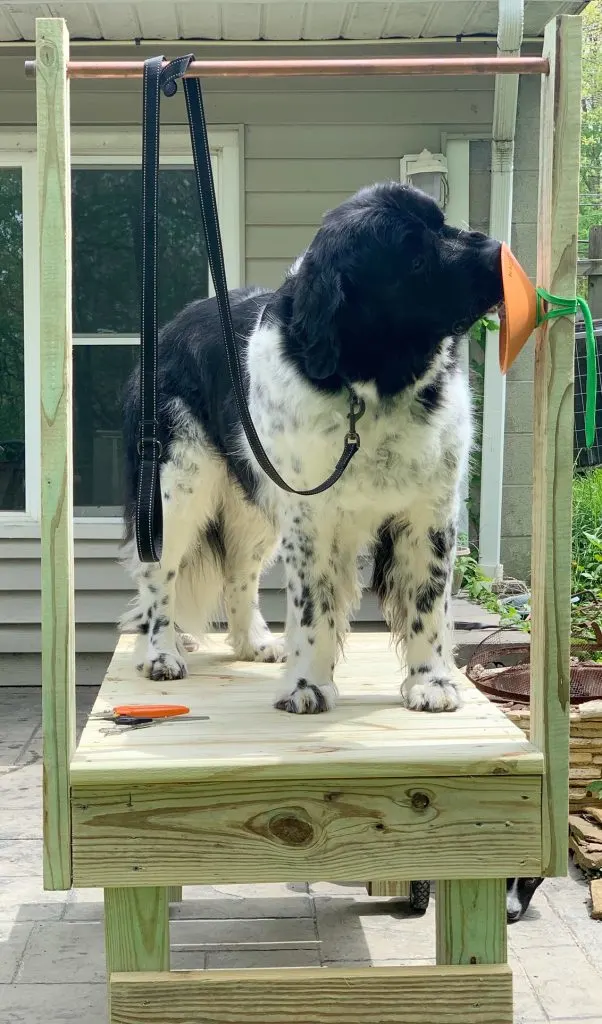
This made it SO easy to trim Odin’s nails and it’s a lot safer than the new trend of wrapping plastic wrap around your head and smearing it with peanut butter.
Please keep in mind that I didn’t add specific measurements for cutting the wood because mine was custom-made to my size.
Yours might be taller, longer, or not as wide.


If you have any questions, please don’t hesitate to reach out and ask!

Looking for tips on how to get your dog on your new grooming table?
Check out 6 Tips On How To Get Your Large Dog On The Grooming Table
p.s. This basic design was based on the bathing stations that I’ve seen in the past at Newfie Nationals.

DIY Grooming Table
DIY Grooming Table for Newfoundlands and other big dog breeds.
Materials
- (1) 4 x 4 x 8 pressure treated post (legs)
- (1) 2 x 4 x 8 pressure treated 2 x 4 (arms)
- (2) 2 x 6 x 10 pressure treated 2 x 6 (frame)
- (2) 12-foot pressure treated deck boards (top)
- (1) 1 pound box of 3" inch deck screws
- (2) 3/8 x 6 toggles
- (4) 3/8" nuts
- (8) 3/8" washers
- (1) 30" copper pipe or any type of rod or hardwood round dowel.
- (2) 6-inch lawnmower wheels
- (1) can of wood sealer.
- Spacers-optional. These are to evenly space your deck boards.
- The wheels are optional but will come in handy if you're going to be moving this around.
Tools
- Miter Saw
- Drill
- Impact Drill
- Tape Measure
- Speed Square
- Hole Saw
Instructions
Measure and cut the legs with a miter saw. Your back legs are going to be shorter because you have to put the wheels on. This measurement will be based on what size wheels you get and where you place them.
Measure and build the frame. This is using the 2 x 6 x 10 wood. Ours is 48″ long and I added 2 inches to the width making it 26″ wide.
Next, you’ll screw the frame to the legs
Measure and cut the deck boards.
Use spacers to evenly space out the boards if you’re planning on using this to bathe your Newfoundland
Measure and cut the arms.
Cut out a hole for the copper pipe using a hole saw (1-1/4) Our pipe is 30 inches long and 39 inches from the deck boards.
Put end caps on if you want the pipe to stay in place.
Seal the wood as directed on the can of sealer.
Notes
Please keep in mind that I didn’t add specific measurements for cutting the wood because mine was custom made to my size.
Most normal grooming tables for big dogs are going to be 48″L x 24″W
This table is 48"L x 26"W
Height is 22" because I'm 5'2"
For the grooming arm you don't have to use a copper pipe. Other materials that can be used are wood, metal, or even PVC pipe.
Sandi
Friday 6th of March 2026
Can you see if you can make a foldable indoor one,for a large golden doodle,she needs cutting every three weeks.can you design one for me.i will be trimming her in my mud room.
Melesa
Saturday 27th of April 2024
I am curious how you would suggest to add on the support for keeping the dog standing for the rear end.... my dogs always seem to sit as soon as I go to groom that area.
Jen
Monday 29th of April 2024
Hi Melesa, Some people add a bar to the middle of the table and use a leash to hold their back end up. They also sell no-sit haunch harnesses. If you don't want to add a bar you can use a plastic tote or a box and place it underneath their belly.
Ingrid Braun
Saturday 13th of April 2024
What are the toggles used for??
Jen
Monday 29th of April 2024
Hi Ingrid,
The toggles are for the wheel axle. You can use a 3/8" threaded rod instead of the toggle if you want.
Laura Showalter
Monday 3rd of July 2023
Hello! My husband is building a Grooming Table on his day off today. Thanks for the tips! I wondered if you mind if I tag you when I post a picture of it on my Facebook page Willow Newfoundlands? ????
Neil D
Monday 13th of March 2023
Thanks for the idea. Just completed and my dog is now comfortably resting on it in the shed. He loves it, and I’m sure next groom we will love it also. No option here for pictures unfortunately. Cheers